This is not the current version. View the latest documentation
Prerequisites
- XCode 10.0 or higher
- Target of iOS 9 or higher, macOS 10.9 or higher, or any version of tvOS or watchOS
Installation
- Download the latest release of Realm and extract the zip.
- Go to your Xcode project’s “General” settings. Drag
RealmSwift.frameworkandRealm.frameworkfrom the appropriate Swift-versioned directory for your project inios/,osx/,tvos/orwatchos/directory to the “Embedded Binaries” section. Make sure Copy items if needed is selected (except if using Realm on multiple platforms in your project) and click Finish. - In your unit test target’s “Build Settings”, add the parent path to
RealmSwift.frameworkin the “Framework Search Paths” section. -
If using Realm in an iOS, tvOS or watchOS project, create a new “Run Script Phase” in your app’s target’s “Build Phases” and paste the following snippet in the script text field:
bash "${BUILT_PRODUCTS_DIR}/${FRAMEWORKS_FOLDER_PATH}/Realm.framework/strip-frameworks.sh"This step is required to work around an App Store submission bug when archiving universal binaries.
- Install CocoaPods 1.6.0 or later.
- Run
pod repo updateto make CocoaPods aware of the latest available Realm versions. - In your Podfile, add
use_frameworks!andpod 'RealmSwift'to your main and test targets. - From the command line, run
pod install. - Use the
.xcworkspacefile generated by CocoaPods to work on your project!
- Install Carthage 0.33.0 or later.
- Add
github "realm/realm-cocoa"to your Cartfile. - Run
carthage update. - Drag
RealmSwift.frameworkandRealm.frameworkfrom the appropriate platform directory inCarthage/Build/to the “Linked Frameworks and Libraries” section of your Xcode project’s “General” settings.
iOS/tvOS/watchOS: On your application target’s “Build Phases” settings tab, click the “+” icon and choose “New Run Script Phase”. Create a Run Script with the following contents:
/usr/local/bin/carthage copy-frameworksand add the paths to the frameworks you want to use under “Input Files”, e.g.:
$(SRCROOT)/Carthage/Build/iOS/Realm.framework$(SRCROOT)/Carthage/Build/iOS/RealmSwift.frameworkThis script works around an App Store submission bug triggered by universal binaries.
Getting started
If you’re looking to use Realm from Objective‑C, or from mixed Objective‑C & Swift apps, please see Realm Objective‑C instead. The Realm Objective‑C and Realm Swift APIs are not interoperable and using them together is not supported.
Realm Swift enables you to efficiently write your app’s model layer in a safe, persisted and fast way. Here’s what it looks like:
// Define your models like regular Swift classes
class Dog: Object {
    @objc dynamic var name = ""
    @objc dynamic var age = 0
}
class Person: Object {
    @objc dynamic var name = ""
    @objc dynamic var picture: Data? = nil // optionals supported
    let dogs = List<Dog>()
}

// Use them like regular Swift objects
let myDog = Dog()
myDog.name = "Rex"
myDog.age = 1
print("name of dog: \(myDog.name)")

// Get the default Realm
let realm = try! Realm()

// Query Realm for all dogs less than 2 years old
let puppies = realm.objects(Dog.self).filter("age < 2")
puppies.count // => 0 because no dogs have been added to the Realm yet

// Persist your data easily
try! realm.write {
    realm.add(myDog)
}

// Queries are updated in realtime
puppies.count // => 1

// Query and update from any thread
DispatchQueue(label: "background").async {
    autoreleasepool {
        let realm = try! Realm()
        let theDog = realm.objects(Dog.self).filter("age == 1").first
        try! realm.write {
            theDog!.age = 3
        }
    }
}
Realm Studio
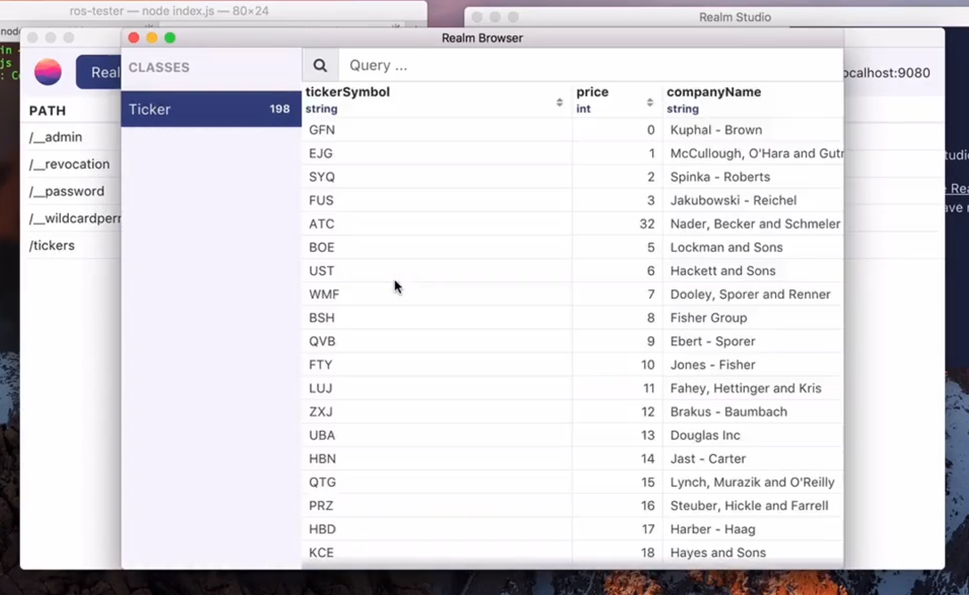
Realm Studio is our premiere developer tool, built so you can easily manage the Realm Database and Realm Platform. With Realm Studio, you can open and edit local and synced Realms, and administer any Realm Object Server instance. It supports Mac, Windows and Linux.


Create a test database with sample data using the menu item Tools > Generate demo database.
If you need help finding your app’s Realm file, check this StackOverflow answer for detailed instructions.
Examples
You can find example applications for both iOS and macOS in our release zip under examples/, demonstrating how to use many features of Realm like migrations, how to use it with UITableViewControllers, encryption, command-line tools and much more.
Using the Realm framework
At the top of your Swift source files, use import RealmSwift to import Realm Swift and make it available for use with your code. That’s all you need to get started!
tvOS
Because writing to the “Documents” directory is prohibited on tvOS, the default Realm location is set to NSCachesDirectory. However, please be mindful that tvOS can purge files in the “Caches” directory at any point, so we encourage you to rely on Realm as a rebuildable cache rather than storing important user data.
If you would like to share a Realm file between a tvOS app and a TV services extension (e.g. Top Shelf extension), you have to use the Library/Caches/ directory within the shared container for the application group.
let fileURL = FileManager.default
    .containerURL(forSecurityApplicationGroupIdentifier: "group.io.realm.examples.extension")!
    .appendingPathComponent("Library/Caches/default.realm")
You can also bundle prebuilt Realm files in your app. However, be sure to comply with App Store guidelines, keeping your app under 200MB. Please browse our tvOS examples for sample tvOS apps demonstrating how to use Realm as either an offline cache or with preloaded data.
Using Realm with background app refresh
On iOS 8 and above, files inside apps are automatically encrypted using NSFileProtection whenever the device is locked. If your app attempts to do any work involving Realm while the device is locked and the NSFileProtection attributes of your Realm files are set to encrypt them (which is the case by default), an open() failed: Operation not permitted exception will be thrown.
In order to handle this, it is necessary to ensure that the file protection attributes applied to both the Realm file itself and its auxiliary files is downgraded to a less strict one that allows file access even when the device is locked, such as NSFileProtectionCompleteUntilFirstUserAuthentication.
If you choose to opt out of complete iOS file encryption in this way, we encourage you to use Realm’s own built-in encryption to ensure your data is still properly secured.
Since the auxiliary files can sometimes be lazily created and deleted mid-operation, we recommend that you apply the file protection attributes to the parent folder containing these Realm files. This will ensure the attribute is properly applied to all of the relevant Realm files, regardless of their creation time.
let realm = try! Realm()

// Get our Realm file's parent directory
let folderPath = realm.configuration.fileURL!.deletingLastPathComponent().path

// Disable file protection for this directory
try! FileManager.default.setAttributes([FileAttributeKey(rawValue: NSFileProtectionKey): NSFileProtectionNone],
                                       ofItemAtPath: folderPath)
Realms
A Realm is an instance of a Realm Mobile Database container.
For a detailed discussion about Realms, please read The Realm Data Model.
Opening Local Realms
To open a Realm, instantiate a new Realm object:
let realm = try! Realm()

try! realm.write {
    realm.add(myDog)
}
This instantiates the default Realm.
Configuring a Local Realm
Configure a Realm before opening it by creating an instance of Realm.Configuration and setting the appropriate properties. Creating and customizing a configuration value allows you to customize, among other aspects:
- The path to a local Realm’s file location
- The migration function, if a Realm’s schemas change between revisions and must be updated
- Configuring the compaction function to ensure efficient utilization of disk space.
The configuration can either be passed to Realm(configuration: config) each time you need a Realm instance, or you can set the configuration to use for the default Realm with Realm.Configuration.defaultConfiguration = config.
For example, suppose you have an application where users have to log in to your web backend, and you want to support quickly switching between accounts. You could give each account its own Realm file that will be used as the default Realm by doing the following:
func setDefaultRealmForUser(username: String) {
    var config = Realm.Configuration()

    // Use the default directory, but replace the filename with the username
    config.fileURL = config.fileURL!.deletingLastPathComponent().appendingPathComponent("\(username).realm")

    // Set this as the configuration used for the default Realm
    Realm.Configuration.defaultConfiguration = config
}
You can have multiple configuration objects, so you can control the version, schema and location of each Realm independently.
let config = Realm.Configuration(
    // Get the URL to the bundled file
    fileURL: Bundle.main.url(forResource: "MyBundledData", withExtension: "realm"),
    // Open the file in read-only mode as application bundles are not writeable
    readOnly: true)

// Open the Realm with the configuration
let realm = try! Realm(configuration: config)

// Read some data from the bundled Realm
let results = realm.objects(Dog.self).filter("age > 5")
The most common location to store writable Realm files is the “Documents” directory on iOS and the “Application Support” directory on macOS. Please respect Apple’s iOS Data Storage Guidelines, which recommend that if documents that can be regenerated by the app should be stored in the <Application_Home>/Library/Caches directory. If a custom URL is used to initialize a Realm, it must describe a location with write permissions.
The default Realm
You may have noticed so far that we have initialized access to our realm variable by calling Realm(). That method returns a Realm object that maps to a file named default.realm in the Documents folder (iOS) or Application Support folder (macOS) of your app.
Opening a synchronized Realm
Are you looking to use Realm Mobile Platform to synchronize all of your Realm Databases? All sync related documentation has been moved to our platform documentation
In-memory Realms
By setting the inMemoryIdentifier rather than the fileURL on your Realm.Configuration, you can create a Realm that runs entirely in memory without being persisted to disk. Setting inMemoryIdentifier will nil out fileURL (and vice-versa).
let realm = try! Realm(configuration: Realm.Configuration(inMemoryIdentifier: "MyInMemoryRealm"))In-memory Realms do not save data across app launches, but all other features of Realm will work as expected, including querying, relationships and thread-safety. This is a useful option if you need flexible data access without the overhead of disk persistence.
In-memory Realms create several files in a temporary directory for coordinating things like cross-process notifications. No data is actually written to the files unless the operating system needs to swap to disk due to memory pressure.
Notice: When all in-memory Realm instances with a particular identifier go out of scope with no references, all data in that Realm is deleted. We recommend holding onto a strong reference to any in-memory Realms during your app’s lifetime. (This is not necessary for on-disk Realms.)
Error handling
Like any disk I/O operation, creating a Realm instance could sometimes fail if resources are constrained. In practice, this can only happen the first time a Realm instance is created on a given thread. Subsequent accesses to a Realm from the same thread will reuse a cached instance and will always succeed.
To handle errors when first accessing a Realm on a given thread, use Swift’s built-in error handling mechanism:
do {
    let realm = try Realm()
} catch let error as NSError {
    // handle error
}
Auxiliary Realm files
Alongside the standard .realm files, Realm also generates and maintains additional files and directories for its own internal operations.
.realm.lock- A lock file for resource locks..realm.management- Directory of interprocess lock files..realm.note- A named pipe for notifications.
These files don’t have any effect on .realm database files, and won’t cause any erroneous behavior if their parent database file is deleted or replaced.
When reporting Realm issues, please be sure to include these auxiliary files along with your main .realm file as they contain useful information for debugging purposes.
Bundling a Realm
It’s common to seed an app with initial data, making it available to your users immediately on first launch. Here’s how to do this:
- First, populate the Realm. You should use the same data model as your final, shipping app to create a Realm and populate it with the data you wish to bundle with your app. Since Realm files are cross-platform, you can use a macOS app (see our JSONImport example) or your iOS app running in the simulator.
- In the code where you’re generating this Realm file, you should finish by making a compacted copy of the file (see
Realm().writeCopyToPath(_:encryptionKey:)). This will reduce the Realm’s file size, making your final app lighter to download for your users. - Drag the new compacted copy of your Realm file to your final app’s Xcode Project Navigator.
- Go to your app target’s build phases tab in Xcode and add the Realm file to the “Copy Bundle Resources” build phase.
- At this point, your bundled Realm file will be accessible to your app. You can find its path by using
NSBundle.main.pathForResource(_:ofType:). - If the bundled Realm contains fixed data that you don’t need to modify, you can open it directly from the bundle path by setting
readOnly = trueon theRealm.Configurationobject. Otherwise, if it’s initial data that you’ll be modifying, you can copy the bundled file to your application’s Documents directory usingNSFileManager.default.copyItemAtPath(_:toPath:).
You can refer to our migration sample app for an example of how to use a bundled Realm file.
Class subsets
In some scenarios you may wish to limit which classes can be stored in a specific Realm. For example, if you have two teams working on different components of your application which both use Realm internally, you may not want to have to coordinate migrations between them. You can do this by setting the objectTypes property of your Realm.Configuration:
let config = Realm.Configuration(objectTypes: [MyClass.self, MyOtherClass.self])
let realm = try! Realm(configuration: config)
Compacting Realms
Realm works in such a way that the size of a Realm file is always larger than the total size of the objects stored within it. See our documentation on threading for some of the reasons why this architecture enables some of Realm’s great performance, concurrency and safety advantages.
In order to avoid making expensive system calls, Realm files are rarely shrunk at runtime. Instead, they grow by specific size increments, with new data being written within unused space tracked inside the file. However, there may be situations in which a significant portion of a Realm file is comprised of unused space. In order to deal with this, you may set the shouldCompactOnLaunch block property upon a Realm’s configuration object to determine if, when opened for the first time, the Realm file should be compacted. For example:
let config = Realm.Configuration(shouldCompactOnLaunch: { totalBytes, usedBytes in
    // totalBytes refers to the size of the file on disk in bytes (data + free space)
    // usedBytes refers to the number of bytes used by data in the file

    // Compact if the file is over 100MB in size and less than 50% 'used'
    let oneHundredMB = 100 * 1024 * 1024
    return (totalBytes > oneHundredMB) && (Double(usedBytes) / Double(totalBytes)) < 0.5
})
do {
    // Realm is compacted on the first open if the configuration block conditions were met.
    let realm = try Realm(configuration: config)
} catch {
    // handle error compacting or opening Realm
}
The compaction operation works by reading the entire contents of the Realm file, rewriting it to a new file at a different location, then replacing the original file. Depending on the amount of data in a file, this may be an expensive operation.
We encourage you to experiment with the numbers to identify a good balance between performing the compaction too often and letting Realm files grow too large.
Finally, if another process is accessing the Realm, compaction will be skipped even if the configuration block’s conditions were met. That’s because compaction cannot be safely performed while a Realm is being accessed.
Deleting Realm files
In some cases, such as clearing caches, or resetting your entire dataset, it may be appropriate to completely delete a Realm file from disk.
Because Realm avoids copying data into memory except when absolutely required, all objects managed by a Realm contain references to the file on disk, and must be deallocated before the file can be safely deleted. This includes all objects read from (or added to) the Realm, all List, Results, and ThreadSafeReference objects, and the Realm itself.
In practice, this means that deleting a Realm file should be done either on application startup before you have opened the Realm, or after only opening the Realm within an explicit autorelease pool, which ensures that all of the Realm objects will have been deallocated.
Finally, although not strictly necessary, you should delete auxiliary Realm files as well as the main Realm file to fully clean up all related files.
autoreleasepool {
    // all Realm usage here
}
let realmURL = Realm.Configuration.defaultConfiguration.fileURL!
let realmURLs = [
    realmURL,
    realmURL.appendingPathExtension("lock"),
    realmURL.appendingPathExtension("note"),
    realmURL.appendingPathExtension("management")
]
for URL in realmURLs {
    do {
        try FileManager.default.removeItem(at: URL)
    } catch {
        // handle error
    }
}
Models
Realm data models are defined as regular Swift classes with regular properties. To create one, simply subclass Object or an existing Realm model class. Realm model objects mostly function like any other Swift objects. You can define your own methods on them, conform them to protocols, and use them like you would any other object. The main restriction is that you can only use an object on the thread which it was created.
Relationships and nested data structures are modeled by including properties of the target type or Lists for typed lists of objects. List instances can also be used to model collections of primitive values (for example, an array of strings or integers).
import RealmSwift

// Dog model
class Dog: Object {
    @objc dynamic var name = ""
    @objc dynamic var owner: Person? // Properties can be optional
}

// Person model
class Person: Object {
    @objc dynamic var name = ""
    @objc dynamic var birthdate = Date(timeIntervalSince1970: 1)
    let dogs = List<Dog>()
}
Since Realm parses all models defined in your code at launch, they must all be valid, even if they are never used.
When using Realm from Swift, the Swift.reflect(_:) function is used to determine information about your models, which requires that calling init() succeed. This means that all non-optional properties must have a default value.
See our API documentation on Object for more details.
Supported property types
Realm supports the following property types: Bool, Int, Int8, Int16, Int32, Int64, Double, Float, String, Date, and Data.
CGFloat properties are discouraged, as the type is not platform independent.
String, Date and Data properties can be optional. Object properties must be optional. Storing optional numbers is done using RealmOptional.
Required properties
String, Date, and Data properties can be declared as optional or required (non-optional) using standard Swift syntax. Optional numeric types are declared using the RealmOptional type:
class Person: Object {
    // Optional string property, defaulting to nil
    @objc dynamic var name: String? = nil

    // Optional int property, defaulting to nil
    // RealmOptional properties should always be declared with `let`,
    // as assigning to them directly will not work as desired
    let age = RealmOptional<Int>()
}

let realm = try! Realm()
try! realm.write() {
    var person = realm.create(Person.self, value: ["Jane", 27])
    // Reading from or modifying a `RealmOptional` is done via the `value` property
    person.age.value = 28
}
RealmOptional supports Int, Float, Double, Bool, and all of the sized versions of Int (Int8, Int16, Int32, Int64).
Primary keys
Override Object.primaryKey() to set the model’s primary key. Declaring a primary key allows objects to be looked up and updated efficiently and enforces uniqueness for each value. Once an object with a primary key is added to a Realm, the primary key cannot be changed.
class Person: Object {
    @objc dynamic var id = 0
    @objc dynamic var name = ""

    override static func primaryKey() -> String? {
        return "id"
    }
}
Indexing properties
To index a property, override Object.indexedProperties(). Like primary keys, indexes make writes slightly slower, but makes queries using equality and IN operators faster. (It also makes your Realm file slightly larger, to store the index.) It’s best to only add indexes when you’re optimizing the read performance for specific situations.
class Book: Object {
    @objc dynamic var price = 0
    @objc dynamic var title = ""

    override static func indexedProperties() -> [String] {
        return ["title"]
    }
}
Realm supports indexing for string, integer, boolean, and Date properties.
Ignoring properties
If you don’t want to save a field in your model to its Realm, override Object.ignoredProperties(). Realm won’t interfere with the regular operation of these properties; they’ll be backed by ivars, and you can freely override their setters and getters.
class Person: Object {
    @objc dynamic var tmpID = 0
    var name: String { // read-only properties are automatically ignored
        return "\(firstName) \(lastName)"
    }
    @objc dynamic var firstName = ""
    @objc dynamic var lastName = ""

    override static func ignoredProperties() -> [String] {
        return ["tmpID"]
    }
}
Ignored properties behave exactly like normal properties. They don’t support any Realm-specific functionality (e.g., they can’t be used in queries and won’t trigger notifications). They can still be observed using KVO.
Property attributes
Realm model properties must have the @objc dynamic var attribute to become accessors for the underlying database data. Note that if the class is declared as @objcMembers (Swift 4 or later), the individual properties can just be declared as dynamic var.
There are three exceptions to this: LinkingObjects, List and RealmOptional. Those properties cannot be declared as dynamic because generic properties cannot be represented in the Objective‑C runtime, which is used for dynamic dispatch of dynamic properties. These properties should always be declared with let.
Property cheatsheet
This table provides a handy reference to declaring model properties.
| Type | Non-optional | Optional |
|---|---|---|
| Bool | @objc dynamic var value = false | let value = RealmOptional<Bool>() |
| Int | @objc dynamic var value = 0 | let value = RealmOptional<Int>() |
| Float | @objc dynamic var value: Float = 0.0 | let value = RealmOptional<Float>() |
| Double | @objc dynamic var value: Double = 0.0 | let value = RealmOptional<Double>() |
| String | @objc dynamic var value = "" | @objc dynamic var value: String? = nil |
| Data | @objc dynamic var value = Data() | @objc dynamic var value: Data? = nil |
| Date | @objc dynamic var value = Date() | @objc dynamic var value: Date? = nil |
| Object | n/a: must be optional | @objc dynamic var value: Class? |
| List | let value = List<Type>() | n/a: must be non-optional |
| LinkingObjects | let value = LinkingObjects(fromType: Class.self, property: "property") | n/a: must be non-optional |
Working with Realm objects
Auto-updating objects
Object instances are live, auto-updating views into the underlying data; you never have to refresh objects. Modifying the properties of an object will immediately be reflected in any other instances referring to the same object.
let myDog = Dog()
myDog.name = "Fido"
myDog.age = 1

try! realm.write {
    realm.add(myDog)
}

let myPuppy = realm.objects(Dog.self).filter("age == 1").first
try! realm.write {
    myPuppy!.age = 2
}

print("age of my dog: \(myDog.age)") // => 2
This not only keeps Realm fast and efficient, it allows your code to be simpler and more reactive. If your UI code is dependent on a specific Realm object, you don’t need to worry about refreshing or re-fetching it before triggering a UI redraw.
You can subscribe to Realm notifications to know when Realm data in an object is updated, indicating when your app’s UI should be refreshed.
Model inheritance
Realm allows models to be further subclassed, allowing for code reuse across models, but some Cocoa features that contribute to the runtime’s rich class polymorphism aren’t available. Here’s what’s possible:
- Class methods, instance methods, and properties on parent classes are inherited in their child classes.
- Methods and functions that take parent classes as arguments can operate on subclasses.
The following is currently not possible:
- Casting between polymorphic classes (ie, subclass to subclass, subclass to parent, parent to subclass, etc.)
- Querying on multiple classes simultaneously
- Multi-class containers (
ListandResults)
Adding this functionality to Realm is on the roadmap. For the time being, we’ve provided some code samples for working around some of the more common patterns.
Alternatively, if your implementation allows it, we recommend using the following pattern of class composition to build up subclasses encompassing logic from other classes:
// Base Model
class Animal: Object {
    @objc dynamic var age = 0
}

// Models composed with Animal
class Duck: Object {
    @objc dynamic var animal: Animal? = nil
    @objc dynamic var name = ""
}
class Frog: Object {
    @objc dynamic var animal: Animal? = nil
    @objc dynamic var dateProp = Date()
}

// Usage
let duck = Duck(value: [ "animal": [ "age": 3 ], "name": "Gustav" ])
Collections
Realm has several types that help represent groups of objects, which we refer to as “Realm collections”:
Results, a class representing objects retrieved from queries.List, a class representing to-many relationships in models.LinkingObjects, a class representing inverse relationships in models.RealmCollection, a protocol defining the common interface to which all Realm collections conform.AnyRealmCollection, a type-erased class that can forward calls to a concrete Realm collection likeResults,ListorLinkingObjects.
The Realm collection types each conform to the RealmCollection protocol, which ensures they behave consistently. This protocol inherits from CollectionType so that it may be used in the same ways as other standard library collections. Additional common Realm collection APIs are declared in this protocol, such as querying, sorting and aggregate operations, among others. Lists have additional mutation operations that extend beyond the protocol interface such as adding and deleting objects or values.
Using the RealmCollection protocol, you can write generic code that can operate on any Realm collection:
func operateOn<C: RealmCollection>(collection: C) {
    // Collection could be either Results or List
    print("operating on collection containing \(collection.count) objects")
}
Due to limitations with Swift’s type system, it’s necessary to use a type-erased wrapper such as AnyRealmCollection in order to store this collection as a property or variable:
class ViewController {
//    let collection: RealmCollection
//                    ^
//                    error: protocol 'RealmCollection' can only be used
//                    as a generic constraint because it has Self or
//                    associated type requirements
//
//    init<C: RealmCollection>(collection: C) where C.ElementType == MyModel {
//        self.collection = collection
//    }

    let collection: AnyRealmCollection<MyModel>

    init<C: RealmCollection>(collection: C) where C.ElementType == MyModel {
        self.collection = AnyRealmCollection(collection)
    }
}
Copying objects between Realms
Copying Realm objects to other Realms is as simple as passing in the original object to Realm().create(_:value:update:). For example, realm.create(MyObjectSubclass.self, value: originalObjectInstance). Remember that Realm objects can only be accessed from the thread on which they were first created, so this copy will only work for Realms on the same thread.
Note that Realm().create(_:value:update:) does not support handling cyclical object graphs. Do not pass in an object containing relationships involving objects that refer back to their parents, either directly or indirectly.
Relationships
You can link any two Realm Objects together. Relationships are cheap in Realm: traversing links isn’t expensive in terms of speed or memory. Let’s explore the different types of relationships Realm lets you define between objects.
Link a Object by using Object and List properties. Lists have an interface very similar to Array, and objects contained in a List can be accessed using indexed subscripting. Unlike Arrays, Lists only hold Objects of a single subclass type. For more details, see the API documentation for List.
Assuming your Person model has already been defined (see models), let’s create another model called Dog:
class Dog: Object {
    @objc dynamic var name = ""
}
Many-to-one
To set up a many-to-one or one-to-one relationship, give a model a property whose type is one of your Object subclasses:
class Dog: Object {
    // ... other property declarations
    @objc dynamic var owner: Person? // to-one relationships must be optional
}
You can use this property like you would any other:
let jim = Person()
let rex = Dog()
rex.owner = jim
When using Object properties, you can access nested properties using normal property syntax. For example, rex.owner?.address.country will traverse the object graph and automatically fetch each object from Realm as needed.
Many-to-many
You can can create a relationship to any number of objects or supported primitive values using List properties. Lists contain other Objects or primitive values of a single type and have an interface very similar to a mutable Array.
Lists containing Realm objects may store multiple references to the same Realm object, including objects with primary keys. For example, you may create an empty List and insert the same object into it three times; the List will then return that object if the element at any of the indices 0, 1, and 2 is accessed.
Lists can store primitive values in lieu of Realm objects. To do so, simply define a List containing Bool, Int, Int8, Int16, Int32, Int64, Float, Double, String, Data, or Date values, or the optional versions of any of the aforementioned types.
To add a dogs property on our Person model that links to multiple dogs, we can declare a property of type List<Dog>:
class Person: Object {
    // ... other property declarations
    let dogs = List<Dog>()
}
You can access and assign List properties as usual:
let someDogs = realm.objects(Dog.self).filter("name contains 'Fido'")
jim.dogs.append(objectsIn: someDogs)
jim.dogs.append(rex)
List properties are guaranteed to preserve their order of insertion.
Note that querying Lists containing primitive values is currently not supported.
Inverse relationships
Relationships are unidirectional. Take our two classes Person and Dog as an example. If Person.dogs links to a Dog instance, you can follow the link from Person to a Dog, but there’s no way to go from a Dog to its Person objects. You can set a one-to-one property Dog.owner linking to Person, but those links are independent from one another. Adding a Dog to Person.dogs won’t set that dog’s Dog.owner property to the correct Person. To solve this problem, Realm provides linking objects properties to represent inverse relationships.
class Dog: Object {
    @objc dynamic var name = ""
    @objc dynamic var age = 0
    let owners = LinkingObjects(fromType: Person.self, property: "dogs")
}
With linking objects properties, you can obtain all objects that link to a given object from a specific property. A Dog object can have a property named owners that contains all of the Person objects that have this exact Dog object in their dogs property. Make the owners property of type LinkingObjects and then specifying the relationship that it has with the Person object.
Writes
All changes to an object (addition, modification and deletion) must be done within a write transaction.
Realm objects can be instantiated and used as unmanaged objects (i.e. not yet added to a Realm) just like regular Swift objects. To share objects between threads or re-use them between app launches, however, you must add them to a Realm. Adding an object to a Realm must be done within a write transaction. Since write transactions incur non-negligible overhead, you should architect your code to minimize the number of write transactions.
Realm write operations are synchronous and blocking, not asynchronous. If thread A starts a write operation, then thread B starts a write operation on the same Realm before thread A is finished, thread A must finish and commit its transaction before thread B’s write operation takes place. Write operations always refresh automatically on beginWrite(), so no race condition is created by overlapping writes.
Because write transactions could potentially fail like any other disk IO operations, both Realm.write() & Realm.commitWrite() are marked as throws so you can handle and recover from failures like running out of disk space. There are no other recoverable errors. For brevity, our code samples don’t handle these errors, but you certainly should in your production applications.
Creating objects
When you have defined a model you can instantiate your Object subclass and add the new instance to the Realm. Consider this simple model:
class Dog: Object {
    @objc dynamic var name = ""
    @objc dynamic var age = 0
}
We can create new objects in several ways:
// (1) Create a Dog object and then set its properties
var myDog = Dog()
myDog.name = "Rex"
myDog.age = 10

// (2) Create a Dog object from a dictionary
let myOtherDog = Dog(value: ["name" : "Pluto", "age": 3])

// (3) Create a Dog object from an array
let myThirdDog = Dog(value: ["Fido", 5])- The most obvious is to use the designated initializer to create an object.
- Objects can also be created from dictionaries using appropriate keys and values.
- Finally,
Objectsubclasses can be instantiated using arrays. The values in the array have to be in the same order as the corresponding properties in the model.
Values in an array should correspond to properties stored in the Realm—you shouldn’t specify values for ignored properties, or computed properties.
After the object is created, you can add it to a Realm:
// Get the default Realm
let realm = try! Realm()
// You only need to do this once (per thread)

// Add to the Realm inside a transaction
try! realm.write {
    realm.add(myDog)
}
After you have added the object to the Realm you can continue using it, and all changes you make to it will be persisted (and must be made within a write transaction). Any changes are made available to other threads that use the same Realm when the write transaction is committed.
Please note that writes block each other, and will block the thread they are made on if multiple writes are in progress. This is similar to other persistence solutions and we recommend that you use the usual best practice for this situation: offloading your writes to a separate thread.
Thanks to Realm’s MVCC architecture, reads are not blocked while a write transaction is open. Unless you need to make simultaneous writes from many threads at once, you should favor larger write transactions that do more work over many fine-grained write transactions. When you commit a write transaction to a Realm, all other instances of that Realm will be notified, and be updated automatically.
See Realm and Object for more details.
Nested objects
If an object has properties that are Objects or Lists, these can be set recursively using nested arrays and/or dictionaries. You simply replace each object with a dictionary or array representing its properties:
// Instead of using already existing dogs...
let aPerson = Person(value: ["Jane", 30, [aDog, anotherDog]])

// ...we can create them inline
let anotherPerson = Person(value: ["Jane", 30, [["Buster", 5], ["Buddy", 6]]])
This will work for any combination of nested arrays and dictionaries. Note that a List may only contain Objects, not basic types such as String.
Updating objects
Realm provides a few ways to update objects, all of which offer different tradeoffs depending on the situation.
Typed updates
You can update any object by setting its properties within a write transaction.
// Update an object with a transaction
try! realm.write {
    author.name = "Thomas Pynchon"
}
Key-value coding
Object, Result, and List all conform to key-value coding (KVC). This can be useful when you need to determine which property to update at runtime.
Applying KVC to a collection is a great way to update objects in bulk without the overhead of iterating over a collection while creating accessors for every item.
let persons = realm.objects(Person.self)
try! realm.write {
    persons.first?.setValue(true, forKeyPath: "isFirst")
    // set each person's planet property to "Earth"
    persons.setValue("Earth", forKeyPath: "planet")
}
Objects with primary keys
If your model class includes a primary key, you can have Realm intelligently update or add objects based off of their primary key values using Realm().add(_:update:).
// Creating a book with the same primary key as a previously saved book
let cheeseBook = Book()
cheeseBook.title = "Cheese recipes"
cheeseBook.price = 9000
cheeseBook.id = 1

// Updating book with id = 1
try! realm.write {
    realm.add(cheeseBook, update: .modified)
}
If a Book object with a primary key value of ‘1’ already exists in the database, then that object will simply be updated. If it does not exist, then a completely new Book object will be created and added to the database.
You can also partially update objects with primary keys by passing just a subset of the values you wish to update, along with the primary key:
// Assuming a "Book" with a primary key of `1` already exists.
try! realm.write {
    realm.create(Book.self, value: ["id": 1, "price": 9000.0], update: .modified)
    // the book's `title` property will remain unchanged.
}
You may not pass update: .modified or update: .all for object types which don’t define a primary key.
When updating objects you can choose to either have all of the properties on the existing object set to the passed-in value, or only the properties which have actually changed to new values by passing in either .modified or .all to update: . This decision has a few effects:
- What notifications are produced. When using object notifications,
.allwill report that all properties present in the object passed tovaluehave been modified, while.modifiedwill result in only the properties which have new values being reported. - How conflicting writes are merged when using Realm Object Server. Supposed you have a Book with a title of Cheese Recipes and a price of 9000, and one client calls
realm.create(Book.self, value: ["id": 1, title: "Fruit recipes", price: 9000], update: .all)at the same time as another one callsrealm.create(Book.self, value: ["id": 1, title: "Cheese recipes", price: 4000], update: .all). Because all properties are set, the merged result will be either a Book with a title of Cheese Recipes and a price of 4000 or a Book with a title of Fruit recipes and a price of 9000. If instead they passed.modifiedthe result would be a Book with a title of Fruit recipes and a price of 4000. - Performance. There is a small amount of overhead to checking if properties have changed for
.modified. However, if properties have not changed,.allwill write significantly more data, both increasing the amount of data that has to be written to the local Realm and increasing the number of instructions which need to be processed by the Realm Object Server.
When in doubt, .modified is probably the one you want.
Please note that when updating objects, nil is still considered a valid value for optional properties. If you supply a dictionary with nil property values, then these will be applied to your object and those properties will be emptied. To ensure you don’t experience any unplanned data loss, please make sure to provide only the properties you wish to update when using this method.
Deleting objects
Pass the object to be deleted to the Realm().delete(_:) method within a write transaction.
// let cheeseBook = ... Book stored in Realm

// Delete an object with a transaction
try! realm.write {
    realm.delete(cheeseBook)
}
You can also delete all objects stored in a Realm. Note the Realm file will maintain its size on disk to efficiently reuse that space for future objects.
// Delete all objects from the realm
try! realm.write {
    realm.deleteAll()
}
Queries
Queries return a Results instance, which contains a collection of Objects. Results have an interface very similar to Array and objects contained in a Results can be accessed using indexed subscripting. Unlike Arrays, Results only hold Objects of a single subclass type.
All queries (including queries and property access) are lazy in Realm. Data is only read when the properties are accessed.
Results to a query are not copies of your data: modifying the results of a query (within a write transaction) will modify the data on disk directly. Similarly, you can traverse your graph of relationships directly from the Objects contained in a Results.
Execution of a query is deferred until the results are used. This means that chaining several temporary Results to sort and filter your data does not perform extra work processing the intermediate state.
Once the query has been executed, or a notification block has been added, the Results is kept up to date with changes made in the Realm, with the query execution performed on a background thread when possible.
The most basic method for retrieving objects from a Realm is Realm().objects(_:), which returns a Results of all Object instances of the subclass type being queried from the default Realm.
let dogs = realm.objects(Dog.self) // retrieves all Dogs from the default RealmFiltering
If you’re familiar with NSPredicate, then you already know how to query in Realm. Objects, Realm, List, and Results all provide methods that allow you to query for specific Object instances by simply passing in an NSPredicate instance, predicate string, or predicate format string just as you would when querying an NSArray.
For example, the following would extend our earlier example by calling Results().filter(_:...) to retrieve all tan-colored dogs whose names begin with ‘B’ from the default Realm:
// Query using a predicate string
var tanDogs = realm.objects(Dog.self).filter("color = 'tan' AND name BEGINSWITH 'B'")

// Query using an NSPredicate
let predicate = NSPredicate(format: "color = %@ AND name BEGINSWITH %@", "tan", "B")
tanDogs = realm.objects(Dog.self).filter(predicate)
See Apple’s Predicates Programming Guide for more information about building predicates and use our NSPredicate Cheatsheet. Realm supports many common predicates:
- The comparison operands can be property names or constants. At least one of the operands must be a property name.
- The comparison operators ==, <=, <, >=, >, !=, and BETWEEN are supported for
Int,Int8,Int16,Int32,Int64,Float,DoubleandDateproperty types, e.g.age == 45 - Identity comparisons ==, !=, e.g.
Results<Employee>().filter("company == %@", company). - The comparison operators == and != are supported for boolean properties.
- For
StringandDataproperties, the ==, !=, BEGINSWITH, CONTAINS, and ENDSWITH operators are supported, e.g.name CONTAINS 'Ja' - For
Stringproperties, the LIKE operator may be used to compare the left hand property with the right hand expression:?and*are allowed as wildcard characters, where?matches 1 character and*matches 0 or more characters. Example:value LIKE '?bc*'matching strings like “abcde” and “cbc”. - Case-insensitive comparisons for strings, such as
name CONTAINS[c] 'Ja'. Note that only characters “A-Z” and “a-z” will be ignored for case. The[c] modifier can be combined with the[d]` modifier. - Diacritic-insensitive comparisons for strings, such as
name BEGINSWITH[d] 'e'matching étoile. This modifier can be combined with the[c]modifier. (This modifier can only be applied to a subset of strings Realm supports: see limitations for details.) - Realm supports the following compound operators: “AND”, “OR”, and “NOT”, e.g.
name BEGINSWITH 'J' AND age >= 32. - The containment operand IN, e.g.
name IN {'Lisa', 'Spike', 'Hachi'} - Nil comparisons ==, !=, e.g.
Results<Company>().filter("ceo == nil"). Note that Realm treatsnilas a special value rather than the absence of a value; unlike with SQL,nilequals itself. - ANY comparisons, e.g.
ANY student.age < 21. - The aggregate expressions @count, @min, @max, @sum and @avg are supported on
ListandResultsproperties, e.g.realm.objects(Company.self).filter("employees.@count > 5")to find all companies with more than five employees. - Subqueries are supported with the following limitations:
- @count is the only operator that may be applied to the SUBQUERY expression.
- The
SUBQUERY(…).@countexpression must be compared with a constant. - Correlated subqueries are not yet supported.
Sorting
Results allows you to specify a sort criteria and order based on a key path, a property, or on one or more sort descriptors. For example, the following calls sorts the dogs returned from the example above alphabetically by name:
// Sort tan dogs with names starting with "B" by name
let sortedDogs = realm.objects(Dog.self).filter("color = 'tan' AND name BEGINSWITH 'B'").sorted(byKeyPath: "name")
The key path may also be the property of a to-one relationship:
class Person: Object {
    @objc dynamic var name = ""
    @objc dynamic var dog: Dog?
}
class Dog: Object {
    @objc dynamic var name = ""
    @objc dynamic var age = 0
}

let dogOwners = realm.objects(Person.self)
let ownersByDogAge = dogOwners.sorted(byKeyPath: "dog.age")
Note that sorted(byKeyPath:) and sorted(byProperty:) do not support multiple properties as sort criteria, and cannot be chained (only the last call to sorted will be used). To sort by multiple properties, use the sorted(by:) method with multiple SortDescriptor objects.
For more, see:
Note that the order of Results is only guaranteed to stay consistent when the query is sorted. For performance reasons, insertion order is not guaranteed to be preserved. If you need to maintain order of insertion, some solutions are proposed here.
Chaining queries
One unique property of Realm’s query engine is the ability to chain queries with very little transactional overhead when compared to traditional databases that require a separate trip to the database server for each successive query.
If you wanted a result set for just tan colored dogs, and tan colored dogs whose names also start with ‘B’, you might chain two queries like this:
let tanDogs = realm.objects(Dog.self).filter("color = 'tan'")
let tanDogsWithBNames = tanDogs.filter("name BEGINSWITH 'B'")
Auto-updating results
Results instances are live, auto-updating views into the underlying data, which means results never have to be re-fetched. They always reflect the current state of the Realm on the current thread, including during write transactions on the current thread. The one exception to this is when using for...in enumeration, which will always enumerate over the objects which matched the query when the enumeration is begun, even if some of them are deleted or modified to be excluded by the filter during the enumeration.
let puppies = realm.objects(Dog.self).filter("age < 2")
puppies.count // => 0
try! realm.write {
    realm.create(Dog.self, value: ["name": "Fido", "age": 1])
}
puppies.count // => 1
This applies to all Results: all objects, filtered and chained.
This property of Results not only keeps Realm fast and efficient, it allows your code to be simpler and more reactive. For example, if your view controller relies on the results of a query, you can store the Results in a property and access it without having to make sure to refresh its data prior to each access.
You can subscribe to Realm notifications to know when Realm data is updated, indicating when your app’s UI should be refreshed for example, without having to re-fetch your Results.
Since results are auto-updating, it’s important to not rely on indices and counts staying constant. The only time a Results is frozen is when fast-enumerating over it, which makes it possible to mutate the objects matching a query while enumerating over it:
try! realm.write {
    for person in realm.objects(Person.self).filter("age == 10") {
        person.age += 1
    }
}
Alternatively, use key-value coding to perform operations on Results.
Limiting results
Most other database technologies provide the ability to ‘paginate’ results from queries (such as the ‘LIMIT’ keyword in SQLite). This is often done out of necessity to avoid reading too much from disk, or pulling too many results into memory at once.
Since queries in Realm are lazy, performing this sort of paginating behavior isn’t necessary at all, as Realm will only load objects from the results of the query once they are explicitly accessed.
If for UI-related or other implementation reasons you require a specific subset of objects from a query, it’s as simple as taking the Results object, and reading out only the objects you need.
// Loop through the first 5 Dog objects
// restricting the number of objects read from disk
let dogs = try! Realm().objects(Dog.self)
for i in 0..<5 {
    let dog = dogs[i]
    // ...
}
Migrations
When working with any database, it is likely your data model will change over time. Since data models in Realm are defined as standard Swift classes, making model changes is as easy as changing any other Swift class.
Suppose we have the following Person model:
class Person: Object {
    @objc dynamic var firstName = ""
    @objc dynamic var lastName = ""
    @objc dynamic var age = 0
}
We want to update the data model to require a fullName property, rather than separate first and last names. To do this, we simply change the object interface to the following:
class Person: Object {
    @objc dynamic var fullName = ""
    @objc dynamic var age = 0
}
At this point if you had saved any data with the previous model version, there will be a mismatch between what Realm sees defined in code and the data Realm sees on disk. When this occurs, an exception will be thrown when you try to open the existing file unless you run a migration.
Note that default property values aren’t applied to new objects or new properties on existing objects during migrations. We consider this to be a bug, and are tracking it as #1793.
Local migrations
Local migrations are defined by setting Realm.Configuration.schemaVersion and Realm.Configuration.migrationBlock. Your migration block provides all the logic for converting data models from previous schemas to the new schema. When creating a Realm with this configuration, the migration block will be applied to update the Realm to the given schema version if a migration is needed.
Suppose we want to migrate the Person model declared earlier. The minimal necessary migration block would be the following:
// Inside your application(application:didFinishLaunchingWithOptions:)

let config = Realm.Configuration(
    // Set the new schema version. This must be greater than the previously used
    // version (if you've never set a schema version before, the version is 0).
    schemaVersion: 1,

    // Set the block which will be called automatically when opening a Realm with
    // a schema version lower than the one set above
    migrationBlock: { migration, oldSchemaVersion in
        // We haven’t migrated anything yet, so oldSchemaVersion == 0
        if (oldSchemaVersion < 1) {
            // Nothing to do!
            // Realm will automatically detect new properties and removed properties
            // And will update the schema on disk automatically
        }
    })

// Tell Realm to use this new configuration object for the default Realm
Realm.Configuration.defaultConfiguration = config

// Now that we've told Realm how to handle the schema change, opening the file
// will automatically perform the migration
let realm = try! Realm()
At the very minimum we need to update the version with an empty block to indicate that the schema has been upgraded (automatically) by Realm.
Updating values
While this is the minimum acceptable migration, we probably want to use this block to populate any new properties (in this case fullName) with something meaningful. Within the migration block we can call Migration().enumerateObjects(ofType: _:_:) to enumerate each Object of a certain type, and apply any necessary migration logic. Notice how for each enumeration the existing Object instance is accessed via an oldObject variable and the updated instance is accessed via newObject:
// Inside your application(application:didFinishLaunchingWithOptions:)

Realm.Configuration.defaultConfiguration = Realm.Configuration(
    schemaVersion: 1,
    migrationBlock: { migration, oldSchemaVersion in
        if (oldSchemaVersion < 1) {
            // The enumerateObjects(ofType:_:) method iterates
            // over every Person object stored in the Realm file
            migration.enumerateObjects(ofType: Person.className()) { oldObject, newObject in
                // combine name fields into a single field
                let firstName = oldObject!["firstName"] as! String
                let lastName = oldObject!["lastName"] as! String
                newObject!["fullName"] = "\(firstName) \(lastName)"
            }
        }
    })
Once the migration is successfully completed, the Realm and all of its objects can be accessed as usual by your app.
Renaming properties
Renaming the property on a class as part of a migration is more efficient than copying values and preserves relationships rather than duplicating them.
To rename a property during a migration, make sure that your new models have a property with the new name and don’t have a property with the old name.
If the new property has different nullability or indexing settings, those will be applied during the rename operation.
Here’s how you could rename Person’s yearsSinceBirth property to age:
// Inside your application(application:didFinishLaunchingWithOptions:)

Realm.Configuration.defaultConfiguration = Realm.Configuration(
    schemaVersion: 1,
    migrationBlock: { migration, oldSchemaVersion in
        // We haven’t migrated anything yet, so oldSchemaVersion == 0
        if (oldSchemaVersion < 1) {
            // The renaming operation should be done outside of calls to `enumerateObjects(ofType: _:)`.
            migration.renameProperty(onType: Person.className(), from: "yearsSinceBirth", to: "age")
        }
    })
Linear migrations
Suppose we have two users for our app: JP and Tim. JP updates the app very often, but Tim happens to skip a few versions. It’s likely that JP has seen every new version of our app, and every schema upgrade in order: he downloaded a version of the app that took him from v0 to v1, and later another update that took him from v1 to v2. In contrast, it’s possible that Tim might download an update of the app that will need to take him from v0 to v2 immediately. Structuring your migration blocks with non-nested if (oldSchemaVersion < X) calls ensures that they will see all necessary upgrades, no matter which schema version they start from.
Another scenario may arise in the case of users who skipped versions of your app. If you delete a property email at version 2 and re-introduce it at version 3, and a user jumps from version 1 to version 3, Realm will not be able to automatically detect the deletion of the email property, as there will be no mismatch between the schema on disk and the schema in the code for that property. This will lead to Tim’s Person object having a v3 address property that has the contents of the v1 address property. This may not be a problem, unless you changed the internal storage representation of that property between v1 and v3 (say, went from an ISO address representation to a custom one). To avoid this, we recommend you nil out the email property on the if (oldSchemaVersion < 3) statement, guaranteeing that all Realms upgraded to version 3 will have a correct dataset.
Notifications
It is possible to register a listener to receive notifications for changes on a Realm or its entities. Realm notifications are sent when the Realm as a whole is changed; collection notifications are sent when individual objects are changed, added, or removed.
Notifications are delivered as long as a reference is held to the returned notification token. You should keep a strong reference to this token on the class registering for updates, as notifications are automatically unregistered when the notification token is deallocated.
Notifications are always delivered on the thread that they were originally registered on. That thread must have a currently running run loop. If you wish to register notifications on a thread other than the main thread, you are responsible for configuring and starting a run loop on that thread if one doesn’t already exist.
Notification handlers are asynchronously called after each relevant write transaction is committed, no matter which thread or process the write transaction took place on.
If a Realm is advanced to the latest version as part of starting a write transaction, notification handlers might be called synchronously. This will happen if, when the Realm was advanced to the latest version, Realm entities being observed were modified or deleted in a way that would trigger notifications. Such notifications will run within the context of the current write transaction, meaning attempting to begin a write transaction within the notification handler will cause Realm to throw an exception. If your app is architected in such a way that this scenario could occur, you can use Realm.isInWriteTransaction to determine whether you are already inside a write transaction or not.
Since notifications are delivered using a run loop, the delivery of notifications might be delayed by other activity on the run loop. When notifications can’t be delivered immediately, changes from multiple write transactions may be coalesced into a single notification.
Realm notifications
A notification handler can be registered on an entire Realm. Every time a write transaction involving that Realm is committed, no matter which thread or process the write transaction took place on, the notification handler will be fired:
// Observe Realm Notifications
let token = realm.observe { notification, realm in
    viewController.updateUI()
}

// later
token.invalidate()
Sometimes you want to write to Realm without triggering the notification handler. For example, you may update the UI immediately in response to a user action to make your app appear responsive. When the notification handler later applies the update again to the already-updated UI, it could put the UI out of sync with the data source.
To suppress specific notifications for specific writes, pass the tokens of the notifications you want to ignore to the Realm.write(withoutNotifying:) method:
let realm = try! Realm()

// Observe Realm Notifications
let token = realm.observe { notification, realm in
    // ... handle update
}

// Later, pass the token in an array to the realm.write(withoutNotifying:)
// method to write without send a notification to that observer.
try! realm.write(withoutNotifying: [token]) {
    // ... write to realm
}

// Finally
token.invalidate()
Collection notifications
Collection notifications don’t receive the whole Realm, but instead receive fine-grained descriptions of changes. These consist of the indices of objects that have been added, removed, or modified since the last notification. Collection notifications are delivered asynchronously, first with the initial results and then again after each write transaction which changes any of the objects in the collection (or adds new ones).
These changes can be accessed via the RealmCollectionChange parameter that is passed to the notification block. This object holds information about the indices affected by deletions, insertions and modifications.
The first two, deletions and insertions, record the indices whenever objects start and stop being part of the collection. This takes into account when you add objects to the Realm or delete them from the Realm. For Results this also applies when you filter for specific values and the object was changed so that it is now matching the query or not matching anymore. For collections based either on List or LinkingObjects, including derived Results, this applies in addition when objects are added or removed from the relationship.
You’re notified about modifications whenever a property of an object in the collection has changed. This also happens for changes on to-one and to-many relationships, although notifications won’t take inverse relationships into account.
class Dog: Object {
    @objc dynamic var name = ""
    @objc dynamic var age = 0
}

class Person: Object {
    @objc dynamic var name = ""
    let dogs = List<Dog>()
}
Let’s assume you’re observing a list of dog owners as given by the model code above. You will be notified about modifications for a matched Person object when:
- You modify the
Person’snameproperty. - You add or remove a
Dogto thePerson’sdogsproperty. - You modify the
ageproperty of aDogbelonging to thatPerson.
This makes it possible to discretely control the animations and visual updates made to the content inside your UI, instead of arbitrarily reloading everything each time a notification occurs.
class ViewController: UITableViewController {
    var notificationToken: NotificationToken? = nil

    override func viewDidLoad() {
        super.viewDidLoad()
        let realm = try! Realm()
        let results = realm.objects(Person.self).filter("age > 5")

        // Observe Results Notifications
        notificationToken = results.observe { [weak self] (changes: RealmCollectionChange) in
            guard let tableView = self?.tableView else { return }
            switch changes {
            case .initial:
                // Results are now populated and can be accessed without blocking the UI
                tableView.reloadData()
            case .update(_, let deletions, let insertions, let modifications):
                // Query results have changed, so apply them to the UITableView
                tableView.beginUpdates()
                // Always apply updates in the following order: deletions, insertions, then modifications.
                // Handling insertions before deletions may result in unexpected behavior.
                tableView.deleteRows(at: deletions.map({ IndexPath(row: $0, section: 0)}),
                                     with: .automatic)
                tableView.insertRows(at: insertions.map({ IndexPath(row: $0, section: 0) }),
                                     with: .automatic)
                tableView.reloadRows(at: modifications.map({ IndexPath(row: $0, section: 0) }),
                                     with: .automatic)
                tableView.endUpdates()
            case .error(let error):
                // An error occurred while opening the Realm file on the background worker thread
                fatalError("\(error)")
            }
        }
    }

    deinit {
        notificationToken?.invalidate()
    }
}
Object notifications
Realm supports object-level notifications. You may register a notification on a particular Realm object in order to be notified if the object is deleted, or whenever any of the managed properties on the object have their values modified. (This also applies to managed properties that have their values set to their existing value.)
Only objects managed by a Realm may have notification handlers registered on them.
For write transactions performed on different threads or in different processes, the block will be called when the Realm that manages the object is (auto)refreshed to a version including the changes, while for local write transactions it will be called at some point in the future after the write transaction is committed.
The notification handler takes an ObjectChange enum value which indicates if the object was deleted, if property values on the object were changed, or if an error occurred. The notification block will be called with ObjectChange.deleted if the object was deleted. The block will never be called again.
The block will be called with ObjectChange.change if the object’s properties were changed. The enum will contain an array of PropertyChange values. Each of these values contains the name of a property that was changed (as a string), the previous value, and the current value.
The block will be called with ObjectChange.error containing an NSError if an error occurs. The block will never be called again.
class StepCounter: Object {
    @objc dynamic var steps = 0
}

let stepCounter = StepCounter()
let realm = try! Realm()
try! realm.write {
    realm.add(stepCounter)
}
var token : NotificationToken?
token = stepCounter.observe { change in
    switch change {
    case .change(let properties):
        for property in properties {
            if property.name == "steps" && property.newValue as! Int > 1000 {
                print("Congratulations, you've exceeded 1000 steps.")
                token = nil
            }
        }
    case .error(let error):
        print("An error occurred: \(error)")
    case .deleted:
        print("The object was deleted.")
    }
}
Interface-driven writes
Notifications in Realm are always delivered asynchronously so they never block the main UI thread, causing your app to stutter. However, there are situations when changes need to be done synchronously, on the main thread, and reflected in the UI instantly. We refer to these transactions as interface-driven writes.
For example, say a user adds an item to a table view. The UI should ideally animate this operation and start this process as soon as the user initiates the action.
However, when the Realm change notification for this insertion is delivered a little later, it will indicate that an object was added to the collection backing the table view and we will once again attempt to insert a new row in the UI. This double insertion leads to inconsistent state between the UI and the backing data, which in turn will crash your app!
When performing an interface-driven write, pass the notification tokens of the notification blocks that shouldn’t react to a change for a second time to Realm.commitWrite(withoutNotifying:).
This feature is especially useful when using fine-grained collection notifications with a synchronized Realm, because many of the workarounds to previously account for interface-driven writes rely on controlling the full state of when the app can perform changes. With synchronized Realms, changes are applied whenever they’re synchronized, which can happen at any point in the app’s lifetime.
// Add fine-grained notification block
token = collection.observe { changes in
    switch changes {
    case .initial:
        tableView.reloadData()
    case .update(_, let deletions, let insertions, let modifications):
        // Query results have changed, so apply them to the UITableView
        tableView.beginUpdates()
        // Always apply updates in the following order: deletions, insertions, then modifications.
        // Handling insertions before deletions may result in unexpected behavior.
        tableView.deleteRows(at: deletions.map({ IndexPath(row: $0, section: 0)}),
                             with: .automatic)
        tableView.insertRows(at: insertions.map({ IndexPath(row: $0, section: 0) }),
                             with: .automatic)
        tableView.reloadRows(at: modifications.map({ IndexPath(row: $0, section: 0) }),
                             with: .automatic)
        tableView.endUpdates()
    case .error(let error):
        // handle error
        ()
    }
}

func insertItem() throws {
    // Perform an interface-driven write on the main thread, making sure
    // the change notification doesn't apply the change a second time
    try collection.realm!.write(withoutNotifying: [token]) {
        collection.insert(Item(), at: 0)
    }
    // And mirror it instantly in the UI instead
    tableView.insertRows(at: [IndexPath(row: 0, section: 0)], with: .automatic)
}
Key-value observation
Realm objects are key-value observing compliant for most properties. Almost all managed (non-ignored) properties on Object subclasses are KVO-compliant, along with the invalidated property on Object and List. (LinkingObjects properties can’t be observed using KVO.)
Observing properties of unmanaged instances of Object subclasses works just like with any other dynamic property, but note that you cannot add an object to a Realm (with realm.add(obj) or other similar methods) while it has any registered observers.
Observing properties of managed objects (those previously added to a Realm) works a little differently. With managed objects, there are three times when the value of a property may change: when you directly assign to it; when you call realm.refresh() or the Realm is automatically refreshed after a write transaction is committed on a different thread; and when you call realm.beginWrite() after changes on a different thread which have not been picked up by a refresh on the current thread.
In the latter two cases, all of the changes made in the write transaction(s) on another thread will be applied at once, and KVO notifications will all be sent at once. Any intermediate steps are discarded, so if in the write transaction you incremented a property from one to ten, on the main thread you’ll get a single notification of a change directly from one to ten. Because properties can change in value when not in a write transaction or even as part of beginning a write transaction, trying to modify managed Realm objects from within observeValueForKeyPath(_:ofObject:change:context:) is not recommended.
Unlike NSMutableArray properties, observing changes made to List properties does not require using mutableArrayValueForKey(_:), although that is supported for compatibility with code not written with Realm in mind. Instead, you can simply call the modification methods on List directly, and anyone observing the property it is stored in will be notified. List properties do not need to be marked as dynamic to be observable, unlike normal properties.
In our example apps you can find a short example of using Realm with ReactiveCocoa from Objective‑C, and ReactKit from Swift.
Encryption
Please take note of the Export Compliance section of our LICENSE, as it places restrictions against the usage of Realm if you are located in countries with an export restriction or embargo from the United States.
Realm supports encrypting the database file on disk with AES-256+SHA2 by supplying a 64-byte encryption key when creating a Realm.
// Generate a random encryption key
var key = Data(count: 64)
_ = key.withUnsafeMutableBytes { bytes in
    SecRandomCopyBytes(kSecRandomDefault, 64, bytes)
}

// Open the encrypted Realm file
let config = Realm.Configuration(encryptionKey: key)
do {
    let realm = try Realm(configuration: config)
    // Use the Realm as normal
    let dogs = realm.objects(Dog.self).filter("name contains 'Fido'")
} catch let error as NSError {
    // If the encryption key is wrong, `error` will say that it's an invalid database
    fatalError("Error opening realm: \(error)")
}
This makes it so that all of the data stored on disk is transparently encrypted and decrypted with AES-256 as needed, and verified with a SHA-2 HMAC. The same encryption key must be supplied every time you obtain a Realm instance.
See our encryption sample app for an end-to-end app that generates an encryption key, stores it securely in the keychain, and uses it to encrypt a Realm.
There is a small performance hit (typically less than 10% slower) when using encrypted Realms.
Working with synced Realms
Are you looking to use Realm Mobile Platform to synchronize all of your Realm Databases? All sync related documentation has been moved to our platform documentation
Threading
Realm read transaction lifetimes are tied to the memory lifetime of Realm instances. Avoid “pinning” old Realm transactions by using auto-refreshing Realms and wrapping all use of Realm APIs from background threads in explicit autorelease pools.
Refer to our Current Limitations for more details on this effect.
Within individual threads you can just treat everything as regular objects without worrying about concurrency or multithreading. There is no need for any locks or resource coordination to access them (even if they are simultaneously being modified on other threads) and it is only modifying operations that have to be wrapped in write transactions.
Realm makes concurrent usage easy by ensuring that each thread always has a consistent view of the Realm. You can have any number of threads working on the same Realms in parallel, and since they all have their own snapshots, they will never cause each other to see inconsistent state.
The only thing you have to be aware of is that you cannot have multiple threads sharing the same instances of Realm objects. If multiple threads need to access the same objects they will each need to get their own instances (otherwise changes happening on one thread could cause other threads to see incomplete or inconsistent data).
Seeing changes from other threads
On the main UI thread (or any thread with a runloop) objects will automatically update with changes from other threads between each iteration of the runloop. At any other time you will be working on the snapshot, so individual methods always see a consistent view and never have to worry about what happens on other threads.
When you initially open a Realm on a thread, its state will be based off the most recent successful write commit, and it will remain on that version until refreshed. Realms are automatically refreshed at the start of every runloop iteration, unless Realm’s autorefresh property is set to NO. If a thread has no runloop (which is generally the case in a background thread), then Realm.refresh() must be called manually in order to advance the transaction to the most recent state.
Realms are also refreshed when write transactions are committed (Realm.commitWrite()).
Failing to refresh Realms on a regular basis could lead to some transaction versions becoming “pinned,” preventing Realm from reusing the disk space used by that version, leading to larger file sizes.
Passing instances across threads
Unmanaged instances of Objects behave exactly as regular NSObject subclasses, and are safe to pass across threads.
Instances of Realm, Results, or List, or managed instances of Object are thread-confined, meaning that they can only be used on the thread on which they were created, otherwise an exception is thrown*. This is one way Realm enforces transaction version isolation. Otherwise, it would be impossible to determine what should be done when an object is passed between threads at different transaction versions without a potentially extensive relationship graph.
Realm exposes a mechanism to safely pass thread-confined instances in three steps:
- Initialize a
ThreadSafeReferencewith the thread-confined object. - Pass that
ThreadSafeReferenceto a destination thread or queue. - Resolve this reference on the target Realm by calling
Realm.resolve(_:). Use the returned object as you normally would.
let person = Person(name: "Jane")
try! realm.write {
    realm.add(person)
}
let personRef = ThreadSafeReference(to: person)
DispatchQueue(label: "background").async {
    autoreleasepool {
        let realm = try! Realm()
        guard let person = realm.resolve(personRef) else {
            return // person was deleted
        }
        try! realm.write {
            person.name = "Jane Doe"
        }
    }
}
A ThreadSafeReference object must be resolved at most once. Failing to resolve a ThreadSafeReference will result in the source version of the Realm being pinned until the reference is deallocated. For this reason, ThreadSafeReference should be short-lived.
Some properties and methods on these types can be accessed from any thread:
Realm: all properties, class methods, and initializers.Object:isInvalidated,objectSchema,realm, class methods, and initializers.Results:objectClassNameandrealm.List:isInvalidated,objectClassName, andrealm.
Using a Realm across threads
To access the same Realm file from different threads, you must initialize a new Realm to get a different instance for every thread of your app. As long as you specify the same configuration, all Realm instances will map to the same file on disk.
Sharing Realm instances across threads is not supported. Realm instances accessing the same Realm file must also all use the same Realm.Configuration.
Realm can be very efficient when writing large amounts of data by batching together multiple mutations within a single transaction. Transactions can also be performed in the background using Grand Central Dispatch to avoid blocking the main thread. Realm objects are not thread safe and cannot be shared across threads, so you must get a Realm instance in each thread/dispatch queue in which you want to read or write. Here’s an example of inserting a million objects in a background queue:
DispatchQueue(label: "background").async {
    autoreleasepool {
        // Get realm and table instances for this thread
        let realm = try! Realm()

        // Break up the writing blocks into smaller portions
        // by starting a new transaction
        for idx1 in 0..<1000 {
            realm.beginWrite()

            // Add row via dictionary. Property order is ignored.
            for idx2 in 0..<1000 {
                realm.create(Person.self, value: [
                    "name": "\(idx1)",
                    "birthdate": Date(timeIntervalSince1970: TimeInterval(idx2))
                ])
            }

            // Commit the write transaction
            // to make this data available to other threads
            try! realm.commitWrite()
        }
    }
}
JSON
Realm does not have direct support for JSON, but it’s possible to add Objects from JSON using the output of NSJSONSerialization.JSONObjectWithData(_:options:). The resulting KVC-compliant object can be used to add/update Objects using the standard APIs for creating and updating objects.
// A Realm Object that represents a city
class City: Object {
    @objc dynamic var city = ""
    @objc dynamic var id = 0
    // other properties left out ...
}

let data = "{\"name\": \"San Francisco\", \"cityId\": 123}".data(using: .utf8)!
let realm = try! Realm()

// Insert from Data containing JSON
try! realm.write {
    let json = try! JSONSerialization.jsonObject(with: data, options: [])
    realm.create(City.self, value: json, update: .modified)
}
If there are nested objects or arrays in the JSON, these will be mapped automatically to to-one and to-many relationships. See the nested objects section for more detail.
When inserting or updating JSON data in a Realm using this approach, be aware that Realm expects the JSON property names and types to exactly match the Object properties. For example:
floatproperties should be initialized withfloat-backedNSNumbers.DateandDataproperties cannot be automatically inferred from strings, but should be converted to the appropriate type before passing toRealm().create(_:value:update:).- If a JSON
null(i.e.NSNull) is supplied for a required property, an exception will be thrown. - If no property is supplied on insert for a required property, an exception will be thrown.
- Realm will ignore any properties in the JSON not defined by the
Object.
If your JSON schema doesn’t align exactly with your Realm objects, we recommend you use a third party model mapping framework in order to transform your JSON. Swift has a thriving set of actively maintained model mapping frameworks which work with Realm, some of which are listed in the realm-cocoa repository.
Testing and debugging
Configuring the default Realm
The easiest way to use and test Realm apps is to use the default Realm. To avoid overriding application data or leaking state between tests, you can simply set the default Realm to a new file for each test.
import XCTest

// A base class which each of your Realm-using tests should inherit from rather
// than directly from XCTestCase
class TestCaseBase: XCTestCase {
    override func setUp() {
        super.setUp()

        // Use an in-memory Realm identified by the name of the current test.
        // This ensures that each test can't accidentally access or modify the data
        // from other tests or the application itself, and because they're in-memory,
        // there's nothing that needs to be cleaned up.
        Realm.Configuration.defaultConfiguration.inMemoryIdentifier = self.name
    }
}
Injecting Realm instances
Another way to test Realm-related code is to have all the methods you’d like to test accept a Realm instance as an argument, so that you can pass in different Realms when running the app and when testing it. For example, suppose your app has a method to GET a user profile from a JSON API and you’d like to test that the local profile is properly created:
// Application Code
func updateUserFromServer() {
    let url = URL(string: "http://myapi.example.com/user")
    URLSession.shared.dataTask(with: url!) { data, _, _ in
        let realm = try! Realm()
        createOrUpdateUser(in: realm, with: data!)
    }
}

public func createOrUpdateUser(in realm: Realm, with data: Data) {
    let object = try! JSONSerialization.jsonObject(with: data) as! [String: String]
    try! realm.write {
        realm.create(User.self, value: object, update: .modified)
    }
}

// Test Code

let testRealmURL = URL(fileURLWithPath: "...")

func testThatUserIsUpdatedFromServer() {
    let config = Realm.Configuration(fileURL: testRealmURL)
    let testRealm = try! Realm(configuration: config)
    let jsonData = "{\"email\": \"help@realm.io\"}".data(using: .utf8)!
    createOrUpdateUser(in: testRealm, with: jsonData)
    let expectedUser = User()
    expectedUser.email = "help@realm.io"
    XCTAssertEqual(testRealm.objects(User.self).first!, expectedUser,
                   "User was not properly updated from server.")
}
Debugging
Realm Studio
Realm Studio is our premiere developer tool, built so you can easily manage the Realm Database and Realm Platform. With Realm Studio, you can open and edit local and synced Realms, and administer any Realm Object Server instance. It supports Mac, Windows and Linux.
Debugging apps using Realm’s Swift API must be done through the LLDB console.
Note that although the LLDB script allows inspecting the contents of your Realm variables in Xcode’s UI, this doesn’t yet work for Swift. Instead, those variables will show incorrect data. You should instead use LLDB’s po command to inspect the contents of data stored in a Realm.
Since you’re using Realm as a dynamic framework, you’ll need to make sure your unit test target can find Realm. You can do this by adding the parent path to RealmSwift.framework to your unit test’s “Framework Search Paths”.
If your tests fail with an exception message "Object type 'YourObject' is not managed by the Realm", it’s likely because you’ve linked the Realm framework directly to your test target, which should not be done. Unlinking Realm from your test target should address that.
You should also make sure to only compile your model class files in your application or framework targets; never add them to your unit test targets. Otherwise, those classes will be duplicated when testing, which can lead to difficult to debug issues (see this issue for details).
You’ll need to make sure all the code you need to test is exposed to your unit test targets (use the public access modifier or @testable). See this Stack Overflow answer for details.
Current limitations
Here’s a list of our most commonly hit limitations.
Please refer to our GitHub issues for a more comprehensive list of known issues.
General
Realm aims to strike a balance between flexibility and performance. In order to accomplish this goal, realistic limits are imposed on various aspects of storing information in a Realm. For example:
- Class names are limited to a maximum of 57 UTF8 characters.
- Property names are limited to a maximum of 63 UTF8 characters.
DataandStringproperties cannot hold data exceeding 16MB in size. To store larger amounts of data, either break it up into 16MB chunks or store it directly on the file system, storing paths to these files in the Realm. An exception will be thrown at runtime if your app attempts to store more than 16MB in a single property.- Any single Realm file cannot be larger than the amount of memory your application would be allowed to map in iOS — this changes per device, and depends on how fragmented the memory space is at that point in time (there is a radar open about this issue: rdar://17119975). If you need to store more data, you can map it over multiple Realm files.
- String sorting and case insensitive queries are only supported for character sets in ‘Latin Basic’, ‘Latin Supplement’, ‘Latin Extended A’, ‘Latin Extended B’ (UTF-8 range 0-591).
To avoid size limitations and a performance impact, it is best not to store large blobs (such as image and video files) directly in Realm. Instead, save the file to a file store (such as S3) and keep only the location of the file and any relevant metadata in Realm.
Threads
Although Realm files can be accessed by multiple threads concurrently, you cannot directly pass Realms, Realm objects, queries, and results between threads. If you need to pass Realm objects between threads, you can use the ThreadSafeReference API. Read more about Realm’s threading.
Models
Setters and getters: Since Realm overrides setters and getters to back properties directly by the underlying database, you cannot override them on your objects. A simple workaround is to create new, Realm-ignored properties, whose accessors can be overridden, and can call other setters/getters.
Auto-incrementing properties: Realm has no mechanism for thread-safe/process-safe auto-incrementing properties commonly used in other databases when generating primary keys. However, in most situations where a unique auto-generated value is desired, it isn’t necessary to have sequential, contiguous, integer IDs. A unique string primary key is typically sufficient. A common pattern is to set the default property value to NSUUID().UUIDString to generate unique string IDs.
Another common motivation for auto-incrementing properties is to preserve order of insertion. In some situations, this can be accomplished by appending objects to a List or by using a createdAt property with a default value of Date().
Properties from Objective-C: If you need to access your Realm Swift models from Objective‑C, List and RealmOptional properties will cause the auto-generated Objective‑C header (-Swift.h) to fail to compile because of the use of generics. You can work around this known Swift bug by annotating your List and RealmOptional properties as @nonobjc, which will hide them from the auto-generated Objective‑C header (-Swift.h).
Custom initializers for Object subclasses: When creating your model Object subclasses, you may sometimes want to add your own custom initialization methods for added convenience.
Due to some present limitations with Swift introspection, these methods cannot be designated initializers for the class. Instead, they need to be marked as convenience initializers using the Swift keyword of the same name:
class MyModel: Object {
    @objc dynamic var myValue = ""

    convenience init(myValue: String) {
        self.init() //Please note this says 'self' and not 'super'
        self.myValue = myValue
    }
}
File size
Realm read transaction lifetimes are tied to the memory lifetime of Realm instances. Avoid “pinning” old Realm transactions by using auto-refreshing Realms and wrapping all use of Realm APIs from background threads in explicit autorelease pools.
You should expect a Realm database to take less space on disk than an equivalent SQLite database. If your Realm file is much larger than you expect, it may be because you have a Realm that is referring to an older version of the data in the database.
In order to give you a consistent view of your data, Realm only updates the active version accessed at the start of a run loop iteration. This means that if you read some data from the Realm and then block the thread on a long-running operation while writing to the Realm on other threads, the version is never updated and Realm has to hold on to intermediate versions of the data which you may not actually need, resulting in the file size growing with each write. The extra space will eventually be reused by future writes, or may be compacted—for example, by setting shouldCompactOnLaunch or calling Realm().writeCopyToPath(_:encryptionKey:). To avoid this issue, you may call invalidate to tell Realm that you no longer need any of the objects that you’ve read from the Realm so far, which frees us from tracking intermediate versions of those objects. The Realm will update to the latest version the next time it is accessed.
You may also see this problem when accessing Realm using Grand Central Dispatch. This can happen when a Realm ends up in a dispatch queue’s autorelease pool as those pools may not be drained for some time after executing your code. The intermediate versions of data in the Realm file cannot be reused until the Realm object is deallocated. To avoid this issue, you should use an explicit autorelease pool when accessing a Realm from a dispatch queue.
Initializing Swift properties using Realm APIs
Your Swift app’s classes and structs might be defined with properties whose values are initialized using Realm APIs. For example:
class SomeSwiftType {
    let persons = try! Realm().objects(Person.self)
    // ...
}
If you do define types with such properties, you should note that you may run into problems if such initialization code is called before you have completed setting up your Realm configurations. For example, if you set a migration block for the default Realm configuration in applicationDidFinishLaunching(), but you create an instance of SomeSwiftType before applicationDidFinishLaunching() has run and your Realm requires a migration, you’ll be accessing your Realm before it’s been correctly configured.
In order to avoid such issues you may choose to:
- Defer instantiation of any type that eagerly initializes properties using Realm APIs until after your app has completed setting up its Realm configurations.
- Define your properties using Swift’s
lazykeyword. This allows you to safely instantiate such types at any time during your application’s lifecycle, as long as you do not attempt to access your lazy properties until after your app has set up its Realm configurations. - Only initialize your properties using Realm APIs that explicitly take in user-defined configurations. This way, you can be sure that the configuration values you are using have been set up properly before they are used to open Realms.
Encrypted Realms and multiple processes
Encrypted Realms cannot be accessed by multiple processes simultaneously. This includes iOS Extensions. To work around this, use unencrypted Realms, which can be shared across processes. You can make use of the Security and CommonCrypto system frameworks to encrypt and decrypt data stored in NSData properties on Realm objects.
We’re tracking lifting this limitation in both the Realm Cocoa issue tracker (#1693) and the Realm Core issue tracker (#1845).
Recipes
We’ve put together some recipes showing how to use Realm to accomplish a few specific tasks. We add more recipes regularly, so check back often. If there’s an example you’d like to see, please open an issue on GitHub.
- Building a To-Do App with Realm
- Testing Realm Apps
- Sharing Data between WatchKit & your App with Realm
- Building an iOS Clustered Map View in Swift
- Building an iOS Search Controller in Swift
- Building a Grid Layout with UICollectionView and Realm Swift
- Unidirectional Data Flow in Swift
FAQ
How can I find and view the content of my Realm file(s)?
This SO question describes where to find your Realm file. You can then view the content with our Realm Studio.
How big is the Realm base library?
Realm should only add around 5 to 8 MB to your app’s download size. The releases we distribute are significantly larger because they include support for the iOS, watchOS and tvOS simulators, some debug symbols, and bitcode, all of which are stripped by the App Store automatically when apps are downloaded.
Is Realm open source?
Yes! Realm’s internal C++ storage engine and the language SDKs over it are entirely open source and licensed under Apache 2.0. Realm also optionally includes a closed-source synchronization component, but that is not required to use Realm as an embedded database.
I see a network call to Mixpanel when I run my app
Realm collects anonymous analytics when your app is run with a debugger attached, or when it runs in a simulator. These analytics are completely anonymous and help us improve the product by flagging which versions of Realm, iOS, macOS, or which language you target and which versions we can deprecate support for. This call does not run when your app is in production, or running on your user’s devices, only from inside your simulator or when a debugger is attached. You can see exactly what we collect and how we collect it, as well as the rationale for doing so, in our source code.
Why doesn’t Realm support Swift structs as models?
There are a number of reasons why Realm doesn’t currently support structs as models.
Most importantly, Realm is designed around “live” objects, a concept which is fundamentally incompatible with value type structs. There are a number of features provided by Realm which are incompatible with these semantics: liveness of data, reactiveness of APIs, low memory footprint of data, performance of operations, lazy and cheap access to partial data, lack of data serialization/deserialization, keeping potentially complex object graphs synchronized, etc.
That being said, it is sometimes useful to detach objects from their backing Realm. Unfortunately, this is more often needed to work around temporary limitations in our library rather than as an ideal design decision (such as thread-confinement). This is why we’ve worked hard to ensure that standalone/detached Realm objects behave exactly like plain old NSObjects. We support making “in-memory copies” of Realm objects by exposing an initializer that creates a standalone object via KVC copying of a persisted object’s properties. For example:
let standaloneModelObject = MyModel(value: persistedModelObject)Troubleshooting
Crash reporting
We encourage you to use a crash reporter in your application. Many Realm operations could potentially fail at runtime (like any other disk I/O), so collecting crash reports from your application will help identify areas where either you (or us) can improve error handling and fix crashing bugs.
Most commercial crash reporters have the option of collecting logs. We strongly encourage you to enable this feature. Realm logs metadata information (but no user data) when throwing exceptions and in irrecoverable situations, and these messages can help debug when things go wrong.
Reporting Realm issues
If you’ve found an issue with Realm, please either file an issue on GitHub or email us at help@realm.io with as much information as possible for us to understand and reproduce your issue.
The following information is very useful to us:
- Goals.
- Expected results.
- Actual results.
- Steps to reproduce.
- Code sample that highlights the issue (full Xcode projects that we can compile ourselves are ideal).
- Version of Realm / Xcode / macOS.
- Version of involved dependency manager (CocoaPods / Carthage).
- Platform, OS version, and architecture on which the bug happens (e.g. 64-bit iOS 8.1).
- Crash logs and stack traces. See Crash Reporting above for details.
Dependency managers
If you’ve installed Realm via CocoaPods or Carthage and you’re experiencing build errors, then it’s likely that you’re either using an unsupported version of that dependency manager, Realm’s integration into the project didn’t succeed, or part of your build tools have stale caches. If that is the case, please try removing the folders the dependency manager created and installing again.
You can also try deleting derived data and cleaning the build folder in Xcode; this can fix issues caused by updating build tool versions or making changes to your project setup such as adding a new target, sharing dependencies across targets, etc.
To clean the build folder, hold down the ‘Option’ key while opening the ‘Product’ menu, then choose ‘Clean Build Folder…’. You can also type ‘Clean’ into the Xcode help search menu and select the ‘Clean Build Folder…’ menu item when it shows up in the search results.
CocoaPods
Realm can be installed via CocoaPods 1.6.0 or greater.
If you have troubles with your CocoaPods integration, it might help to reset the integration state. To achieve that simply run the following commands in Terminal out of your project directory:
pod cache clean Realm
pod cache clean RealmSwift
pod deintegrate || rm -rf Pods
pod install --verbose
rm -rf ~/Library/Developer/Xcode/DerivedData
Carthage
Realm can be installed via Carthage 0.33.0 or later.
To remove all Carthage-managed dependencies from your project, simply run the following commands in Terminal out of your project directory:
rm -rf Carthage
rm -rf ~/Library/Developer/Xcode/DerivedData
carthage update
Realm Core binary fails to download
When building Realm, part of the process includes downloading the core library as a static binary and integrating it into the realm-cocoa project. It’s been reported that in certain instances, the core binary fails to download with the following error:
Downloading core failed. Please try again once you have an Internet connection.This error can occur due to any of the following reasons:
- Your IP address range is from a region that is on the list of United States embargoes. In order to comply with U.S. law, Realm has not been made available in that region. For more information, please see our license.
- You are located in mainland China, and due to the country-wide firewall are not able to properly access CloudFlare or Amazon AWS S3 services at the moment. Please see this Realm-Cocoa Issue for more information.
- Amazon AWS S3 could be experiencing service issues. Please check the AWS Service Health Dashboard and try again later.
Operating with low memory constraints
If you’d like to use Realm in a context with little available memory, such as a watchOS app or App Extension, we recommend that you specify the classes to be managed by a Realm explicitly in order to avoid a costly call to objc_copyClassList():
let config = Realm.Configuration(objectTypes: [Dog.self, Person.self])
let realm = try! Realm(configuration: config)
Getting help
- Need help with your code? Ask on StackOverflow. We actively monitor & answer questions on SO!
- Have a bug to report? Open an issue on our repo. If possible, include the version of Realm, a full log, the Realm file, and a project that shows the issue.
- Have a feature request? Open an issue on our repo. Tell us what the feature should do, and why you want the feature.
If you’re using a crash reporter (like Crashlytics or HockeyApp), make sure to enable log collection. Realm logs metadata information (but no user data) when throwing exceptions and in irrecoverable situations, and these messages can help debug when things go wrong.